Tuesday, February 25, 2014

Trays

Don't you love trays?  They have so many uses and always add that extra special touch to a room.  I found this tray for $1 at a yard sale 3 or 4 years ago and then it sat in my garage for most of that time.  
 
 
The man I bought it from said he used it to hold pieces and parts when he took something he was working on apart so he wouldn't lose them.  I thought that was a wise use of a tray.
 
 
As far as I can remember, all I did was add some dark wax to this tray to add to it's already old look.  A few weeks ago I thought I'd add some handles to it, and found these at Hobby Lobby for half off.
 
 
Aren't they perfect?  They add just the right touch.
I keep this tray on a small bench next to my favorite lounging chair where it holds a little bit of everything I need to keep handy.


Then over the weekend I made another tray from a long piece of scalloped wood I bought several years ago for $10 at a flea market. 
 
 
When I bought this piece of wood I had no idea what I was going to do with it, but I loved its shapely curves.  I used a piece of old leftover wood for the bottom.  I would have liked to miter the corners, but thought that might be more of a challenge than I felt up to, so I settled for blunt end corners.


I can hardly wait to find more fun ways to use it throughout the coming seasons.


Linking with
~
Common Ground for Be Inspired
~
French Country Cottage for Feathered Nest Friday
~
The Tablescaper for Seasonal Sundays
~
Mod Vintage Life for Mod Mix Monday
~
Between Naps on the Porch for Metamorphosis Monday
~
Stone Gable for The Scoop
 

Friday, February 21, 2014

Project 1 ~ Refinishing Doors & New Trim


I showed you the beginning of this project about a month ago in it's most messy stage.
 
 
Here is the before with everything stripped down.
 
 
And here is the after. This is a view of the linen closet door on the left and the bathroom door on the right.


All six of these doorways are on a cul de sac of sorts.  My home is not large enough to have a real hallway.  This doorway is open and leads to the living room.


The doorway next to the living room leads to my bedroom.  


Next is another small bedroom which I use as my office.


Then we're back to the linen closet.  I told you it was a small area.  
While I was refinishing the doors and replacing the trim, I also refinished the wood floor in this area and replaced the floor molding.


The doors in my house are original and are about 70 years old with beautiful old hardware.  I cleaned up the knobs with steel wool to bring back the luster.

 
The last door is newer, or I think of it as my new door even though it is 25 years old.  It is a single French door that I put on the entryway to the upstairs.  It allows me to not heat the upstairs bedroom if no one is staying there.


Through this door are the enclosed stairs that has become my next project ~ refinishing the stairs ~ Project 2.
As you can see, they are quite a mess and will be quite a job.
 
 
The door project costs:
 
Floor trim ~ $15.62
Quarter round trim ~ $5.00
Door trim ~ $48.20
Light switch plate ~ $.68
Light switch ~ $2.41
Finish nails ~ $3.70
Door hinges ~ 10.12
Total ~ $85.73

It was so great to bring this project in under budget, unless I were to add the Emergency Room copay of $150 from when I accidentally slashed my wrist with a utility knife while trimming the floor molding.  But lets not count that disaster.

Now on to Project 2.
~
Linking with 
~
The Tablescaper for Seasonal Sundays
~
Mod Vintage Life for Mod Mix Monday
~
Between Naps on the Porch for Metamorphosis Monday


Thursday, February 20, 2014

Look What I Found

I've been toying with the idea of tearing the carpet off my stairs for the last few weeks.  I've been working on refinishing my hardwood floors for some time now and I thought why not just refinish the steps while I'm at it.  The only thing holding me back is all the work it would be and I wasn't quite sure what the quality of the wood was under the carpet.  I realized that in the 25 years I've lived in my house, I've never seen the stairs without carpet.  The only way to find out was to start ripping up the carpet, but then there would be no turning back.
So, last night I took the plunge and this is what I found.
 
 
I found exactly what I was hoping for ~ hardwood treads.  Only they were quite a mess with tons of staples in them.
 
 
The side boards have years of paint on them and will need stripping with a heat gun to make them look new again.
 
 
Lots of paint crud accumulated over the years.  Stripping paint is not a job I like or want to do, but if I'm going to do it, I might as well do it right.
 
 
My stairway is not open and exposed like most homes, 
but is between two walls.  
 
 
It's not a part of the house that is even seen by many, but I am excited at the prospect of having beautiful steps instead of dirty carpet.
I'm excited to get started on them and to share them with you when I'm done. Meanwhile, lots of ripping, staple removing, paint stripping, sanding, staining, and repainting is on the agenda for the next few weeks.

Wednesday, February 19, 2014

10 Projects Under $100


It's income tax time which means it's time to start thinking about how I want to spend my return.  I usually use it to do one major project on my home - something I can't normally afford to do otherwise.  But this year, I decided I wanted to use $1000 dollars and do 10 projects around my house with it.  That leaves me with the challenge of finding 10 needed home projects that I can do for $100 or less.  In today's economy, that can be a challenge, because one only has to make a trip to Lowe's or Home Depot to see how fast the bill mounts up.

 Now I don't really know if I can accomplish all 10 of these projects this year or not, but I am excited to see if I can bring each one in under budget while accomplishing projects I've been wanting to do for some time.
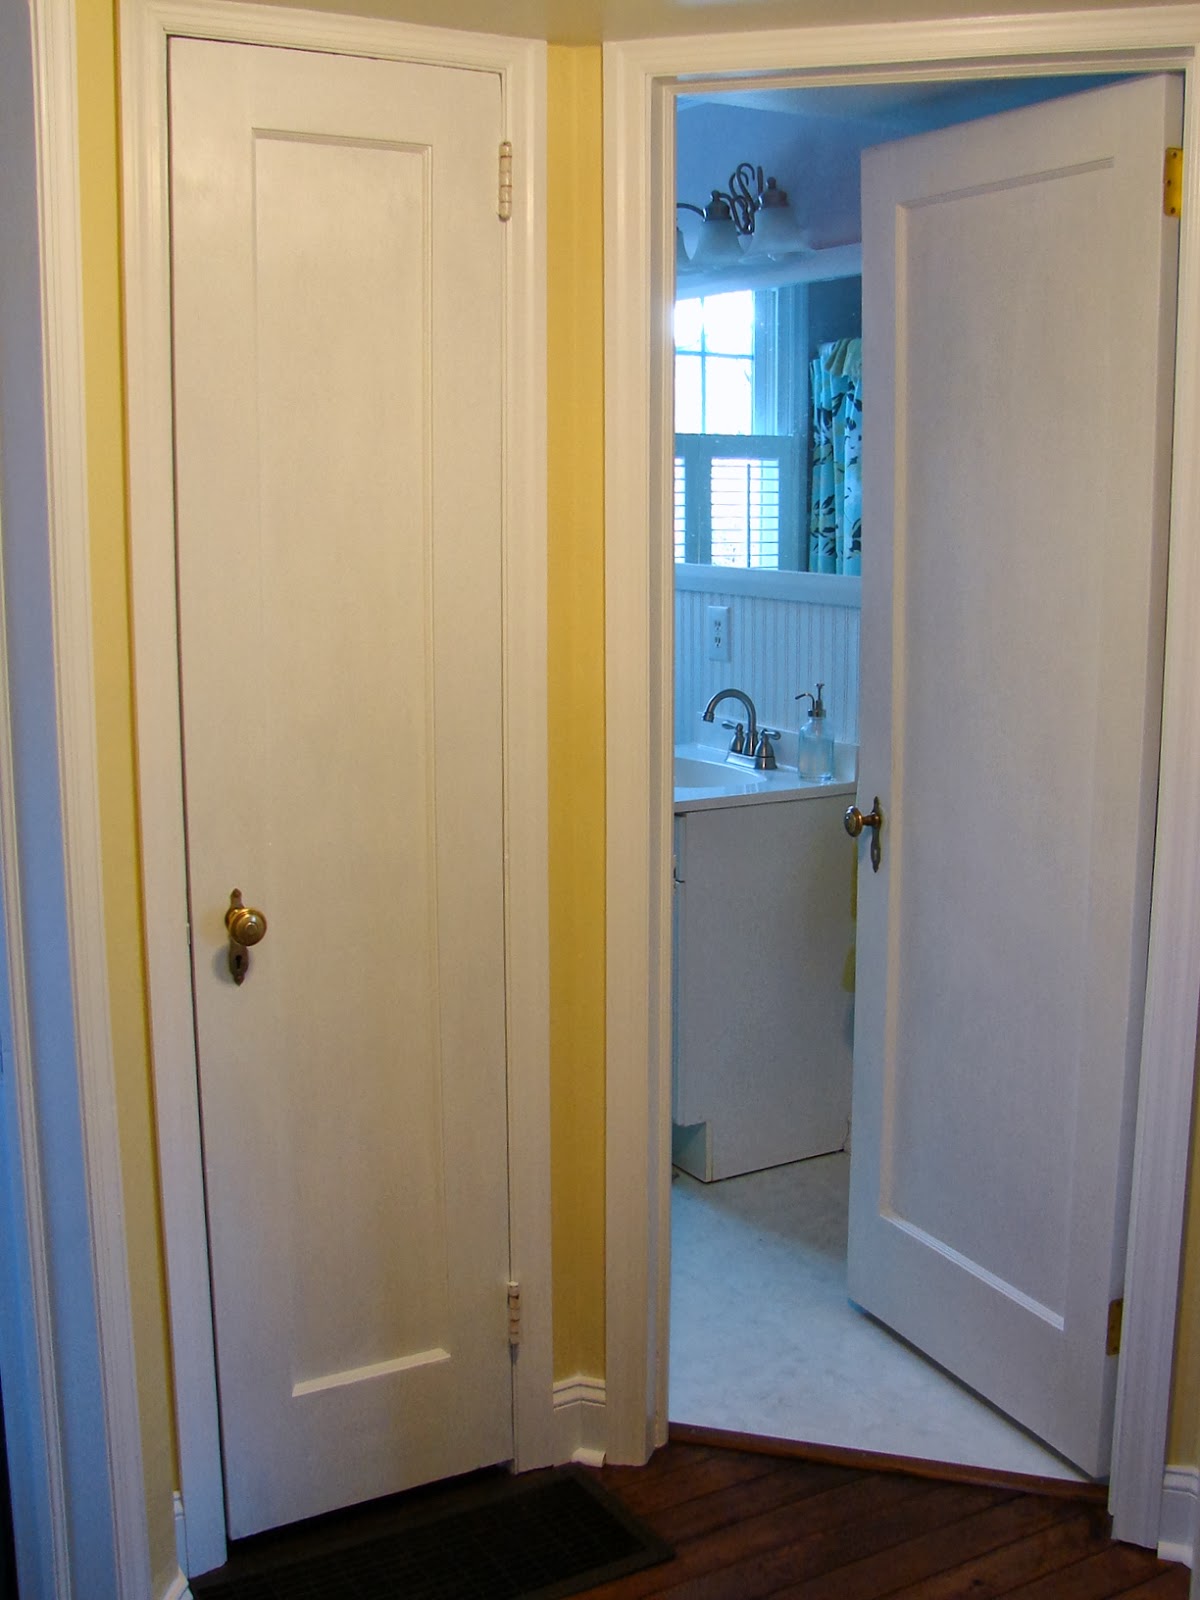
The first of these projects I showed you about a month ago in it's beginning stages - stripping the paint off of the hallway doors, repainting and applying new door and floor trim.
 
 
This project is nearly finished and I will be sharing it in a few days.
Some of the other projects I'm considering are:
  • removing carpet from stairs, stripping paint from side wood, sand & stain stair treads, paint kick boards. 
  • remake front porch steps and paint. 
  • apply lattice to sides of front porch.
  • replace soil and shrubs in front of house.
  • reupholster wing back chair with painter's cloth.
  • install bead board ceiling in laundry room.
  • finish cedar shingle siding in greenhouse.
  • paint side of house.
  • build, paint, and attach lattice arbors to side of house.
  • paint garden shed and greenhouse.
  • finish inside of garden shed.
  • apply hoops and netting over raised garden beds to keep chickens out.
It's not very realistic to think I can really get all this done since there are several other projects that need to be done that will require more time and money.  But making a list and setting a budget is a place to start and keeps me focused and on track.  I love crossing things off my list, and it's even more fun to be able to share them you when they are finished.  So . . . in a few days I'll be back with pictures of the finished doors. 
How are you planning to spend your income tax return?
 

Saturday, February 15, 2014

Warming with Layers

I was browsing through one of my decorating books the other day from Country Living called 750 Great Ideas for Decorating on a Budget.  It is one of my "go to" books when I'm looking for inspiration.  It is thick and full of ideas for every room of the house and outside also.
 
 
 While browsing, I came across a photo of an ottoman draped with a throw. 
 
 
 I thought, "That's something I can do and don't even need a budget".  I have several quilts that I made years ago and they were folded up on a shelf and not in use.  One of them was even the perfect colors.
So I pulled one out of storage and draped it across the ottoman and I was amazed at the effect it had on the room.  The chair and ottoman are a solid colored fabric and I already had a print pillow and throw on the back of the chair, so it wasn't like it really needed anything else.
 
 
But when I added the quilt, everything changed.  It was as if I had added an extra blanket on the bed.  The whole room suddenly looked warmer and more cozy, and I felt like the quilt was inviting me to curl up in the chair.
 
   
The addition of a simple quilt added an extra layer of color and texture to the room that was perfect 
for this cold, snowy, and endless winter.
Of course, I'm not the only one who immediately enjoyed this extra layer of coziness in the room.  
Charlie decided this is his new favorite place for napping.


 I used to have a tradition of making a quilt every time there was a winter Olympics.  I would piece the quilt together before the Olympics started, and then do the hand quilting while watching the games.  I made at least three quilts this way, and this is one of them ~ made in 1984.  I also named the quilt after the city where the Olympics were held and attached a tag to the back of the quilt commemorating it.  This quilt pattern is called "Sawtooth", so I named the quilt "Sawtooth Sarajevo" since the Olympics were in Sarajevo that year.
 
 
It somehow seems appropriate that I should rediscover this 30-year old quilt and snuggle in it while watching the current winter Olympics.


So if you're looking for a way to add extra warmth to your room, you can probably do a complete seasonal redecoration with the fabrics you already own.  After all, you can never have to many blankets or throws ~ especially this winter.

~

Linking with

The Tablescaper for Seasonal Sundays
~
Mod Vintage Life for Mod Mix Monday
~
Between Naps on the Porch for Metamorphosis Monday 
~
We Call It Junkin for History and Home Link Party
~
The Everyday Home for The Scoop


Sunday, February 9, 2014

Let's Be Honest

Let's be honest.  Just between you and me.  How often do you purchase something just because you know it will make a pretty blog post?  I mean, you love it of course, but ~ you absolutely don't need it.  
I admit I did it quite a bit when I first started blogging four years ago.  That's how I ended up with so many sets of dishes.  But ~ as of late, I haven't done it for quite some time.  
Until last week.
 I found this sweet basket/tray at World Market and couldn't resist it.  I absolutely love it.  Perfect for holding plates, mugs, and napkins, or whatever.
 
 
Isn't it just too cute?  It holds my new set of bee salad plates that I just purchased at Cracker Barrel.  I used to be a beekeeper, so I love just about anything with bees on it.
 
 
Now ~ here's the dilemma.  First of all, if you hang mugs on it, they bang into the plates.  If it wasn't for that, it would be perfect for carrying plates, mugs, and napkins to the deck for entertaining.  It also looks darling if you want to display a set of plates and mugs.  But I don't have enough room in my small kitchen to set it out anywhere.  
 
 
I thought about keeping it for entertaining, but I really don't entertain that much.  So basically, it would end up in storage.  I think I would find ways to use it, and I think I would keep it if it didn't have the mug hangers on it, but I just simply don't need it.
 
 
So ~ next time I'm near the mall and it's not snowing, I'm going to return it.  I must admit I got totally caught up in the moment.  Does that ever happen to you?  You see an inspiring blog post, go shopping, and come home with things you don't need.  For me, one unnecessary purchase usually leads to another unnecessary purchase.
So ~ I thought I'd share a few pretty pictures of this sweet basket/tray before I return it and if anyone is interested, it can be purchased at World Market for $19.99 and is called a "White Wire Dishrack".
 
 
The honey pot is a vintage "Tropic Bee" product and still has it's original label on it.  The gold ceramic vase is also a new unnecessary purchase made at the same time as the wire basket from TJ Maxx, but it is a keeper since it matches my dishes so well.
 
 
Bee blessed.
~
Linking with 
 
Mod Vintage Life for Mod Mix Monday
~
Common Ground for Be Inspired 
~
French Country Cottage for Feathered Nest Friday

Thursday, February 6, 2014

Snow Rollers

Do you know what a "snow roller" is?  I didn't until last week either.
 
 
The ones I saw last week look very much like the ones above.  From a distance, they just look like chunks of snow, but once you get parallel with them, you can see right through them.  They look like big white donuts. 
 
 
  None of these pictures are my own because I was on a two-lane road with deep ditches on each side and there was no where to pull over and snap a picture. They need wide open spaces where the wind can blow for them to form and I only saw them in the open fields along this road.

 
They are a rare weather phenomenon which require four or five ingredients to come together at the same time.  The first condition is that the ground must be covered by a layer of ice.  Then you need wet, loose snow on top, and a temperature near freezing.  Lastly, you need 20 - 25 mph winds strong enough to get the snow rolling, but not so strong that they break the weak inner layers of the roller.  They were spotted in numerous places in Northeast and Central Ohio last week after one of the big storms. 
 
 
I really enjoyed them and wish I could have inspected them close up instead of just as a drive by.  More than likely, a "once in a lifetime" spotting.
~
All photos courtesy of Fox 8 News
Related Posts Plugin for WordPress, Blogger...