skip to main |
skip to sidebar
And so it has . . .
. . . softly and quietly it blankets everything.
I actually like the snow ~ except when my snow blower
won't start.
~
Linking with
~
A Southern Daydreamer for Outdoor Wednesday
~
Faded Charm for White Wednesday
![]()
This is the side entrance to my back yard.
It's really just an old chain link fence that has shifted out of shape by time and old tree roots. I've always wanted to replace it with a white picket fence like I have in other parts of my yard, but it would be impossible to dig holes for the fence posts with the numerous roots everywhere.
This spring I redid this side of the yard creating a gravel path and planting forsythia along both sides of the path.
I found the wrought iron head boards at flea markets and yard sales and for the life of me now, I can't remember what my original intent for them was. One day I set them up against the chain link fence and loved the way they looked ~ so there they stayed.
I wish I didn't have to see the chain link behind the head boards, but when you have a small dog who can squeeze through any crack, it's not an option to remove it.
Still ~ it looks better than just the rusty chain link and dresses up the side of the yard a wee bit. I added a wreath to match the ones hanging on the front windows to give the gate a more welcoming look.
Wishing you all a very Merry Christmas.
~
Linking with
~
Common Ground for Vintage Inspiration Friday
~
French Country Cottage for Feathered Nest Friday
![]()
Another peak at my kitchen which is in makeover mode. The kitchen is months away from being done, but bits and pieces of it are finished.
This is a Christmas card I received this year that I thought made the perfect kitchen decoration with a white frame on it.
It sits on my new countertop amidst a small vignette of stacked plates, a Santa mug and glass canisters filled with peppermints.
Currently, my cabinets are still a cranberry red color, but after Christmas I will start heat stripping the paint off of them. I am going to paint them white and have new cabinet doors made in the Shaker style, but this is what they look like now.
I have a very small kitchen. The counter top you see in the above picture represents half of my counter work space. The kitchen is on the north side of the house and consequently never photographs well, even without curtains on the window. Mostly I don't mind my kitchen being so small since it has only been my daughter and myself all these years. Painting the kitchen white is doing wonders for brightening the space and at least gives the illusion of pushing back the walls.
~
This wall is on the opposite side of the room and this door leads to the laundry/furnace room, which is also undergoing a slow makeover. I stripped all the paint off this original, old door and painted one side of it to use as a chalk board. Here is my first attempt at chalk board art.
I wish I could say this was an original art design, but I copied it off of some chalk art I saw on Pinterest.
Next to the door is my refrigerator with my vintage chickens on top.
Behind the chickens is a tall cabinet I have already painted white, but it doesn't have any doors on it yet.
The bottom part of the kitchen walls are bead board that were previously a caramel color and are now painted white. Here is a picture of my new floor that was a pain to lay. More than once I wished I had hired that job out instead of tackling it myself, but at least it is finished along with new base board trim.
And so that's about it for now. Progress is slow, but there's really no rush.
~
Linking with
~
The Tablescaper for Seasonal Sundays
~
Mod Vintage Life for Mod Vintage Mondays
![]()
Finally finished up the outside decorating today. It was a process this year that seemed to go on and on.
I took my usually plain garland that I hang on the picket fences and attached red and silver ornaments to them to spruce them up a little. The garland is getting kind of old and starting to fall apart and I thought it needed a bit of a makeover.
Next I added matching ornaments to the plain wreaths that I always hang on the windows.
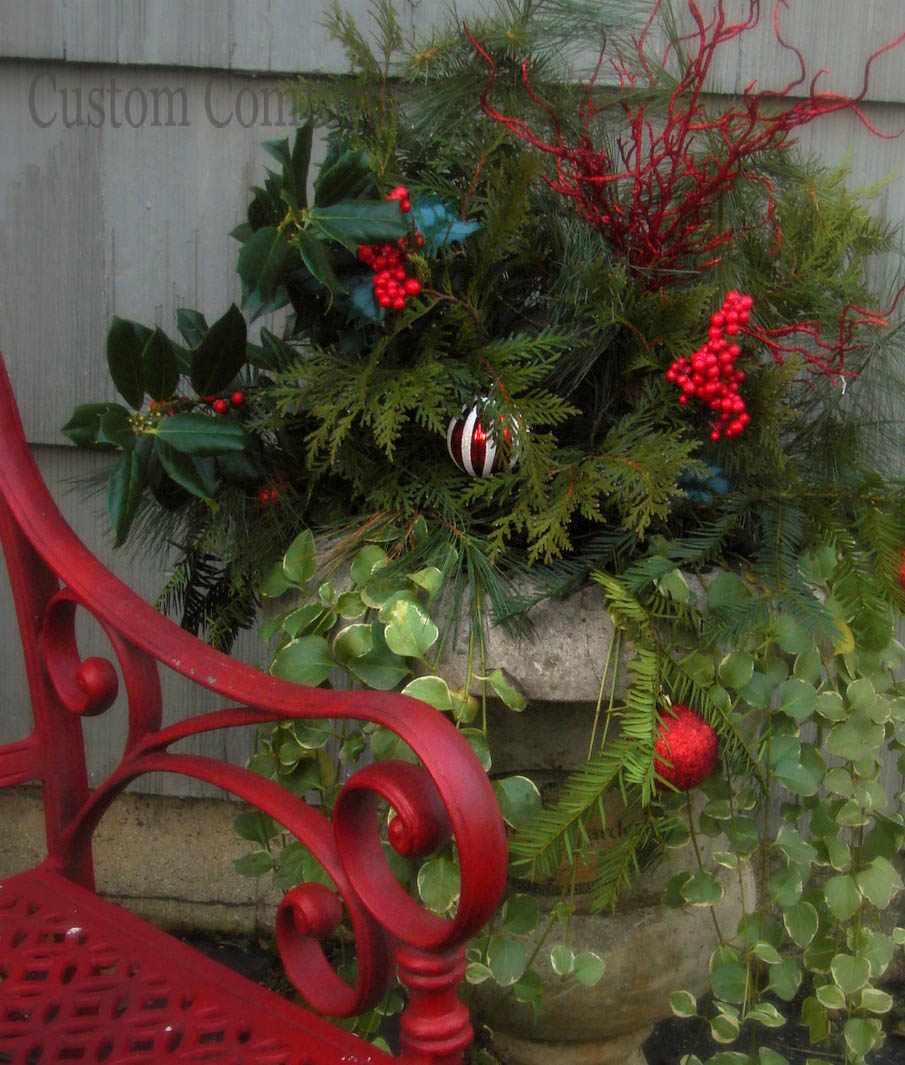
Then I drug out my red wrought iron chairs and filled the urns beside the garage with fresh greens cut from the yard and more ornaments.
Then just today while the sun was actually shining at last, I added the white urn on the pedestal and a sled on the porch.
Wishing you a Merry Christmas from my house to yours.
![]()
In the last few months my office has undergone a
minor makeover mostly consisting of new paint, carpet, and curtains. The office walls were previously a pastel yellow which went well with the blue, but I was longing for the crispness of blue and white.
My office is done in a beach theme which is my attempt to soothe my longing to be near the water.
First I painted the walls white and got rid of all the yellow in the room. Then I added bead board wallpaper to the one wall that isn't textured. Bead board is the perfect look for a beach/cottage theme and went well with the armoir I found last summer at a yard sale and painted white.
I saw a pair of drapes in a spring issue of Victoria magazine that actually inspired my desire to makeover my office. I looked online for similar fabric, but to no avail. Then I emailed Victoria magazine and inquired as to the manufacturer of the drapes, but they didn't know. Then one day, while browsing through a thrift store I rarely visit, I found these drapes which are almost exactly like the ones from the magazine. These drapes are Waverly and only cover the edges of the window, but I was thrilled beyond words to find something so similar and so affordable.
Next, I made new pillows for the sofa. I had all these blue and white fabrics that I had collected over the years and it was fun to finally get to put them to use.
I just love this chenille bedspread that I use on the couch for a throw.
A shelf with pegs over the sofa holds a collection of beachy odds and ends.
A beach/Christmas vignette adorns my desk.
A blue crab that fondly reminds me of when I
lived in Maryland.
And a touch of Christmas.
This sweet little tree I found at a yard sale this summer for $3. It held votive candles and I painted it white. But it is perfect for holding Christmas ornaments too.
I also hung ornaments and snowflakes from the curtain rod that I will leave up all winter.
Linking with
~
Savvy Southern Style for Wow Us Wednesdays
~
The Shabby Nest for Frugal Friday ![]()
I can't explain it, but I've become obsessed with peppermints and I don't even like eating them. But ~ they are so fun and inexpensive to decorate with, especially if purchased at the dollar store.
Just a simple mug of candy canes says Christmas to me.
First I made a peppermint wreath that I saw in a magazine. I added a green faux wreath behind mine to make it larger and to stand out on my off-white walls.
Then yesterday I was over at hip2thrift's blog and saw her peppermint topiary and I was off to the dollar store again to get more mints.
Iuliana gives instructions on how to make this lovely creation over on her blog. This is my version.
And then I started adding mints to the bottom of candles.
And that was followed by putting them on a styrofoam cone.
Oh, the possibilities are endless and what sweet gifts they make, especially if you like to give gifts to everyone, but don't have the funds to do so. This little cone tree was only $2 to make since everything was purchased at the dollar store.
I hope you have fun making a few sweet gifts for yourself and others ~ all you need are mints, styrofoam, and a hot glue gun. If you want to make them even prettier, you can spray them with spray glue and quickly sprinkle white glitter on them. I did that on my wreath and when the lights are on it sparkles and glitters so beautifully.
Linking with
~
The Tablescaper for Seasonal Sundays
~
The Dedicated House for Make it Pretty Monday
~
Mod Vintage Life for Mod Mix Monday
![]()


.jpg)


.JPG)


